
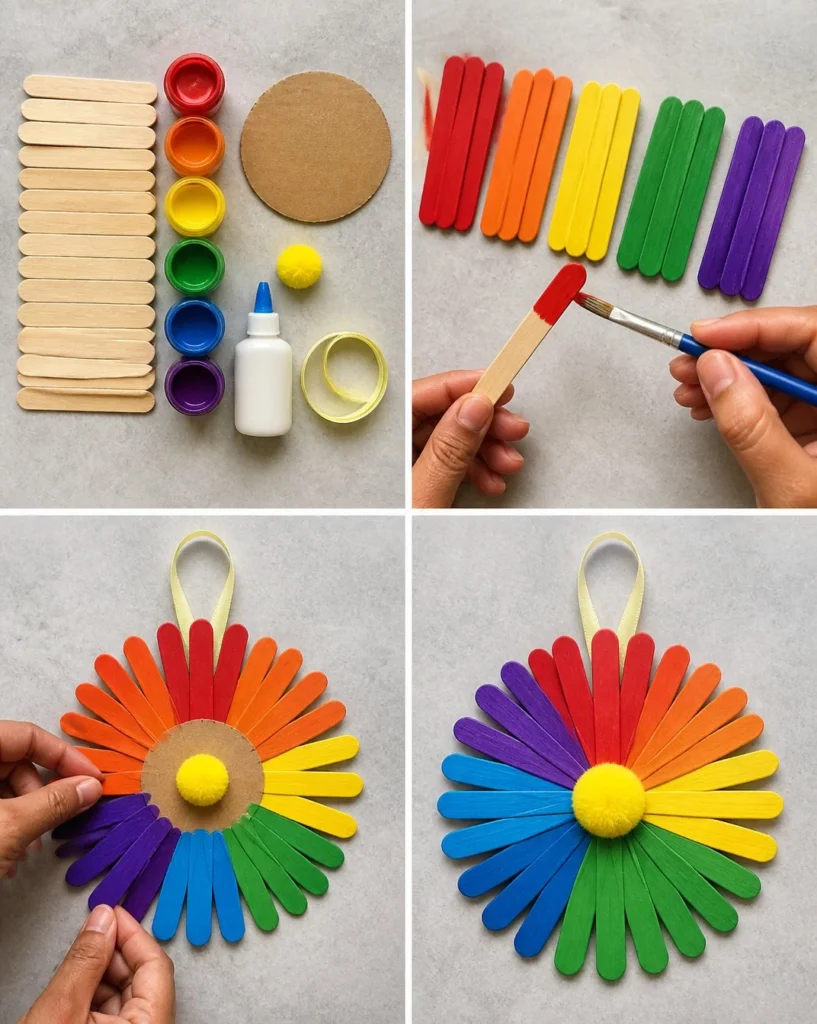
DIY Rainbow Popsicle-Stick Flower Wheel Craft
Crafting can brighten up any room, and this DIY Rainbow Popsicle-Stick Flower Wheel is a cheerful way to add some color to your space! With just a few simple supplies, you and your family can create a lovely flower wheel that’s perfect for decorating walls, doors, or even gifting to someone special. This craft not only allows for creativity with colors but also encourages a hands-on approach to celebrating the beauty of nature.
Let’s dive in and make this delightful flower wheel together!
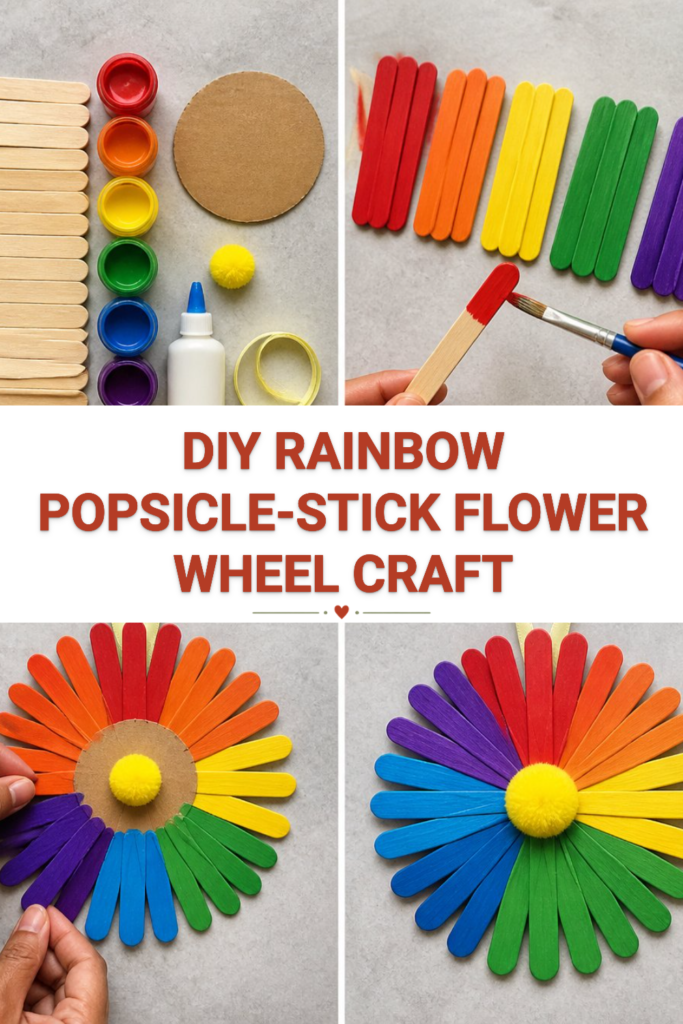
Why You’ll Enjoy This Project
- Colorful Fun: Painting the sticks in bright rainbow colors can be a joyful and relaxing activity for everyone involved.
- Simple and Quick: This project is straightforward and can typically be completed in about an hour, making it perfect for an afternoon crafting session.
- Celebrates Nature: The flower wheel adds a touch of handmade charm to your home and is a wonderful way to bring some outdoor inspiration inside.
- Customizable: You can adapt the colors or sizes to fit any room’s decor or special occasion, making this craft versatile.
- Family Bonding: This is a fantastic project for parents, grandparents, or caregivers to do with kids, creating memories while crafting.
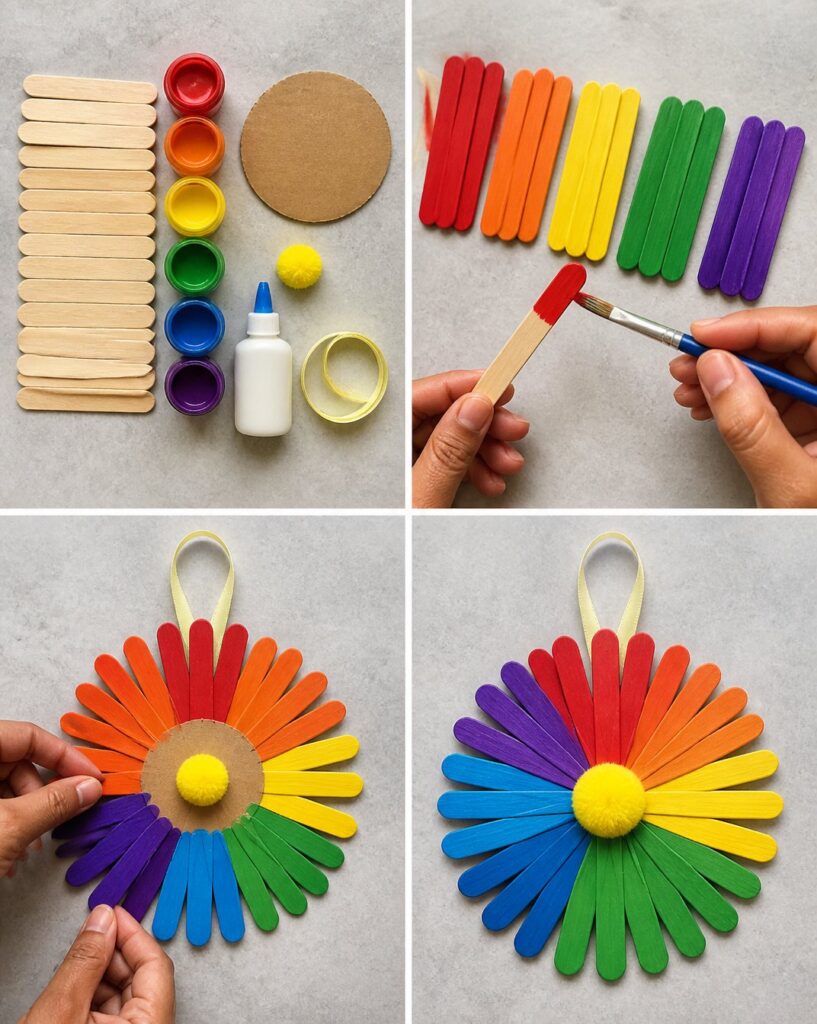
Materials You’ll Need
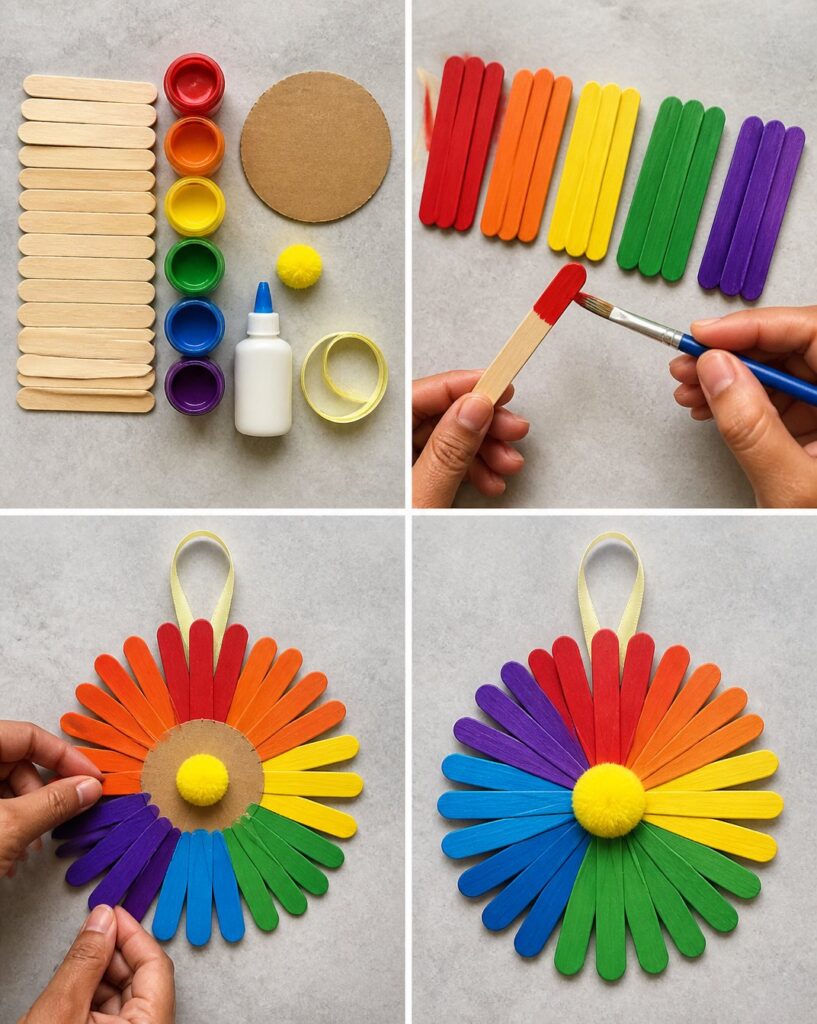
- 24 craft sticks
- Acrylic paint in 6 rainbow colors (red, orange, yellow, green, blue, violet)
- 1 cardboard circle (about 10 inches in diameter)
- 1 yellow pom-pom (for the flower center)
- Glue (craft or hot glue recommended)
- Ribbon (for hanging)
How to Make DIY Rainbow Popsicle-Stick Flower Wheel Craft
- Prepare Craft Sticks: Divide the 24 craft sticks into six groups of four sticks each.
- Paint Sticks: Use the acrylic paint to paint each group a different rainbow color. Make sure to cover each stick completely, and don’t forget to have fun mixing colors too!
- Dry Time: Let all of the painted sticks dry completely. You can place them on newspaper or a drying rack to avoid any mess.
- Assemble the Flower: Once the sticks are dry, take your cardboard circle. Glue the painted sticks around the edge of the circle, evenly spaced like flower petals. Use enough glue to help them stay in place.
- Add the Center: Once the flower petals are secured, glue the yellow pom-pom in the middle of the cardboard circle to form the flower’s center. This adds a lovely pop of color!
- Attach the Ribbon: Cut a length of ribbon (about 12 inches) and attach it to the back of the flower wheel using glue. This will create a loop for hanging, so ensure it’s secure.
- Final Drying: Let the entire flower wheel dry completely before displaying it.
Helpful Tips
- Easier Assembly: To avoid the painted sticks sticking to each other, let them dry in a single layer rather than stacking them.
- Cleaner Results: Use a paintbrush for smooth, even painting. If you’re concerned about your working surface, consider covering it with newspaper or a plastic mat.
- Placement While Drying: Choose a spot where the assembled flower wheel won’t be jostled while drying. A flat, stable surface works best.
- Displaying Your Craft: Think about where you’ll hang the flower wheel before gluing the ribbon. This way, you can ensure it’s the perfect length for your chosen spot.
Easy Variations
- Seasonal Colors: Change the color palette based on seasons soft pastels for spring, warm reds and browns for fall.
- Nature Finds: Add small leaves or dried flowers between the popsicle sticks for a more natural look.
- Different Sizes: Use shorter or longer sticks for different flower wheel sizes, allowing for unique wall decorations.
- Family Names: Write family members’ names on individual sticks using a fine-tip marker for a personalized touch.
- Hanging Options: Instead of using a ribbon, consider adding string or twine for a more rustic look.
Making This Craft With Kids
This craft is perfect for kids ages 5 and up, but adult supervision is recommended when using glue. Let children freely express their creativity with color choices, but ensure they don’t use too much glue to avoid messes. You might want to have some baby wipes on hand for quick clean-ups!
How to Display or Use It
Once completed, hang your DIY Rainbow Popsicle-Stick Flower Wheel on a wall, door, or inside a window. It can also make a lovely gift for friends and family. If you prefer, arrange it on a shelf among other seasonal decor. It brightens up your space and is a great conversation starter!
Frequently Asked Questions
1. Can I use different kinds of paint?
Yes! If you have non-toxic washable paint, that works well too. Just make sure it’s suitable for kids if they are doing the painting.
2. How long will this flower wheel last?
If taken care of, your flower wheel can last for a long time. Keep it indoors to protect it from the elements.
3. What if I don’t have a cardboard circle?
You can cut a circle from a cereal box or any flat cardboard you have at home. Just make sure it’s sturdy enough to hold the sticks.
4. Can I leave it outside?
While it’s best to keep it indoors, if you want to display it outside temporarily, be sure to bring it back in to avoid rain or wind damage.
5. How do I store it?
If you need to store it, lay it flat in a box or on a shelf, ensuring it’s not squished to maintain its shape.